The key job that has an important effect on a fig tree’s health, and vitality is repotting. Whether you’re a professional gardener, or just starting out, mastering how to repot a fig tree is an essential ability for making sure your tree stays healthy and bears delicious fruits. We’ll walk you through the process, of repotting a fig tree in this in-depth guide, keeping it accessible and simple to follow.
Table of Contents
Why Transplant a Fig Tree?
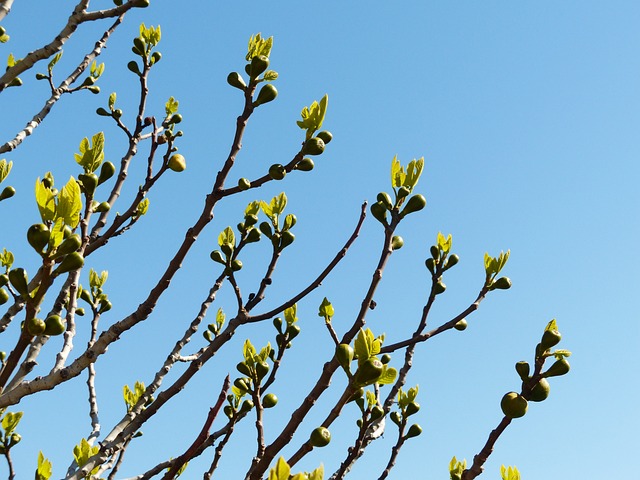
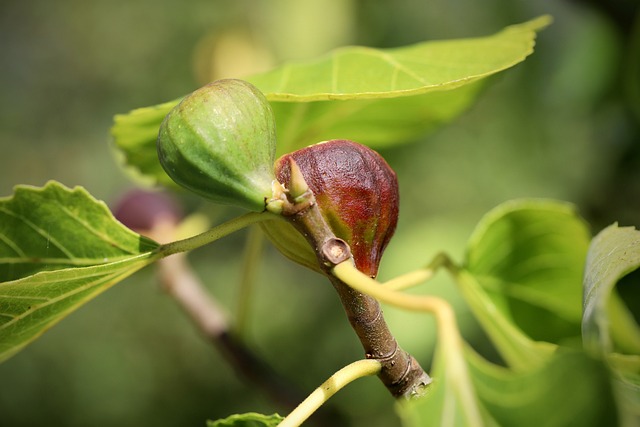
Let’s first examine the importance of repotting, before moving on to the how-to. Fig trees eventually outgrow their containers, becoming root-bound and finding it difficult to get nutrients. Repotting enhances the soil by giving the roots more room to expand, leading to greater growth and more plentiful figs
Materials Required
• A bigger pot • New potting soil
Pruning scissors • Watering bottle
Guide, Step-by-Step
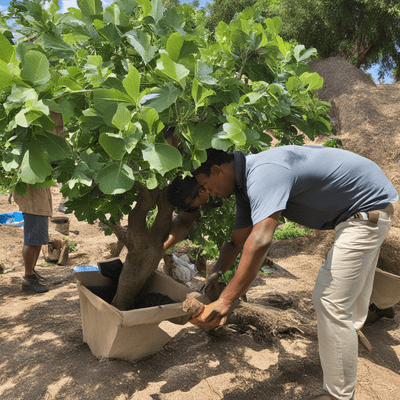
Step 1: Select the Appropriate Time A fig tree should be potted during its dormant season, which is normally in late winter or early spring. The tree will experience less stress as a result.
Step 2: Get the new pot ready Choose a replacement pot, with a diameter that is roughly 2 inches larger than the old one. In order to prevent waterlogging, make sure it has drainage holes.
Third Step: Cut the Roots Remove the fig tree’s present container with care. Utilise pruning shears to cut down any circular or knotted roots. This promotes strong root development.
Add fresh potting mix in step four. Fill the new pot with fresh potting mix , leaving enough space for the root ball. A well-draining mix with compost works wonders. your tree’s growth and adjust its care as needed.
Conclusion
Although repotting a fig tree may appear difficult, with the right approach, it may be satisfying. You may ensure the health of your fig tree and prepare the ground for future growth and delectable harvests by giving it a new, roomy housing and fresh soil. Keep in mind that a little work now can result in a healthy fig tree that will provide you with sweetness for many years. Happy gardening.
fertilizing plants in containers
Here’s a detailed step by step guide, for fertilizing plants in containers presented in a table format:
Step
Action
Details
1
Choose the Right Container
Select a container that provides, adequate space for the plant’s roots and has drainage holes to prevent waterlogging.
2
Select the Right Potting Mix
Use a high-quality potting mix specifically designed for the type of plant you’re growing (e.g., cactus mix for succulents).
3
Choose the Right Fertilizer
Select a balanced slow-release granular fertilizer or a liquid fertilizer suitable for container plants.
4
Read Fertilizer Label
Carefully read and follow, the instructions on the fertilizer label, including dosage and application frequency.
5
Fertilize During the Growing Season
Apply fertilizer during the plant’s active growing season, typically from spring to early fall. Avoid fertilizing in winter when growth slows.
6
Water the Plant Before Fertilizing
Ensure the soil is moist, but not waterlogged before applying fertilizer. This helps prevent root burn.
7
Measure the Fertilizer
Measure the appropriate amount of fertilizer according to the label instructions. Avoid over-fertilizing, which can harm the plant.
8
Sprinkle Granular Fertilizer
For granular fertilizers, sprinkle the measured amount evenly over the soil surface. Be cautious not to let it touch the plant’s stem or leaves.
9
Mix Liquid Fertilizer with Water
If using liquid fertilizer dilute it with water according to the label instructions. Use a watering can or sprayer for even distribution.
10
Apply Fertilizer Around the Root Zone
Distribute the fertilizer around the plant’s root zone, which is usually within the dripline of the foliage.
11
Water Thoroughly After Fertilizing
After applying fertilizer, water the plant well. This helps distribute the nutrients and prevents root burn.
12
Monitor Plant’s Response
Pay attention to how the plant responds to fertilization. Look for signs of healthy growth and adjust the fertilizer, regimen if necessary.
13
Maintain a Fertilization Schedule
Stick to a regular fertilization schedule as recommended on the fertilizer label. Over-fertilizing can be as harmful as under-fertilizing.
14
Consider Micronutrients
Some plants may benefit, from micronutrient supplements such as iron or magnesium. Use them as needed based on plant symptoms and soil tests.
15
Monitor Soil pH
Check the soil’s pH level periodically. Some plants require specific pH levels for optimal nutrient absorption. Adjust pH if necessary.
16
Store Fertilizers Properly
Keep fertilizers in a cool, dry place, tightly sealed to prevent moisture from affecting their quality.
17
Dispose of Unused Fertilizer Responsibly
Dispose of unused or expired fertilizers according to local regulations. Avoid pouring them down drains or onto the soil.
Step
Action
Details
18
Keep Records of Fertilization
Maintain a record, of when you fertilized your plants,the type of fertilizer used, and any specific instructions or observations. This helps you track their growth and adjust your fertilization schedule as needed.
19
Avoid Fertilizing Stressed Plants
Do not fertilize plants that are stressed, due to drought, disease, or pest issues. Address the underlying problems first and resume fertilization when the plant recovers.
20
Use Organic Fertilizers if Desired
Consider using organic fertilizers, if you prefer a natural approach. Organic options include compost, fish emulsion,and seaweed extracts.
21
Be Cautious with New Transplants
Newly transplanted plants may have sensitive roots. Wait a few weeks before applying fertilizer to avoid damaging them.
22
Avoid Foliar Feeding in Full Sun
If using liquid fertilizer,avoid foliar feeding (spraying on leaves) during full sun or high-temperature conditions. It can cause leaf burn.
23
Consider Slow-Release Fertilizers
Slow-release fertilizers provide nutrients gradually over an extended period, reducing the need for frequent applications.
24
Watch for Signs of Over-Fertilization
Yellowing, wilting, or browning of leaves, along with salt deposits on the soil surface, are signs of over-fertilization. Adjust your fertilizer regimen accordingly.
25
Seek Professional Advice if Necessary
If you encounter persistent or complex issues with your container plants, consider consulting with, a local horticulturist or gardening expert for personalized guidance.
Common diseases that can affect container plants
Disease
Description
Powdery Mildew
A fungal disease, characterized by white, powdery spots on leaves and stems. It thrives in humid conditions and can lead to leaf distortion and reduced photosynthesis.
Botrytis Blight (Gray Mold)
Caused by the fungus Botrytis cinerea, it often affects flowers, causing grayish-brown mold and stem rot.It spreads in damp, cool conditions and can result in wilting and decay.
Root Rot
Various soil-borne fungi like Phytophthora and Rhizoctonia, can cause root rot in container plants. Symptoms include yellowing leaves , wilting, and stunted growth due to damaged roots.
Leaf Spot Diseases
These fungal diseases cause dark , circular or irregular spots on leaves.Common types include Septoria leaf spot, Cercospora leaf spot, and Alternaria leaf spot. They can defoliate plants if severe.
Downy Mildew
Unlike powdery mildew, downy mildew appears as yellowish or pale green patche,s on the upper surface of leaves, with a downy growth on the undersides. It affects many plants, including vegetables and ornamentals.
Rust
Rust diseases create orange, yellow, or reddish-brown pustules on leaves, stems, or even fruit. They’re caused by various fungi and can weaken the plant by reducing photosynthesis.
Aphid Infestations
While not a disease, aphids are common pests that can harm container plants by feeding on sap. They can transmit plant viruses and cause leaf curling and stunted growth.
Spider Mites
These tiny arachnids are known for creating fine webbing, on plants. They pierce plant cells to feed, leading to stippling, yellowing, and curling of leaves.
Fungal Blights
Different fungal blights,such as early blight (in tomatoes) and late blight (in potatoes), cause brown lesions on leaves and fruit, leading to reduced yields and plant decline.
Bacterial Leaf Spot
Bacterial infections cause small, dark, water-soaked lesions on leaves. They can spread rapidly in wet conditions, affecting overall plant health.
Frequently asked Question- FAQ
What time of year is ideal for repotting fig trees?
A: The fig tree’s dormant season, which often lasts from late winter to early spring, is the best time to repot it. As a result, the tree suffers fewer difficulties and is more likely to succeed in adjusting to its new pot.
How do I pick the ideal pot for repotting?
A: Choose a pot with a diameter that is roughly 2 inches larger than the one you already have. In order to avoid water from building up and leading to root rot, make sure it has drainage holes.
Should I water the fig tree right away upon repotting?
A: To help the soil settle and reduce transplant shock, water the fig tree well after repotting. Make sure the pot’s bottom is empty of water.
Is trimming the foliage necessary after repotting?
A: After repotting, trimming back some of the foliage can assist offset the loss of roots. As a result, the tree experiences less stress and is able to use its energy more effectively.
After repotting, how should I take care of the fig tree?
A8: Plant the fig tree in a location that receives enough sunlight, and throughout the first several weeks, maintain the soil constantly moist. Keep an eye on its growth and modify the watering and care as necessary.
If my fig tree is producing fruit right now, may I repot it?
A9: Although it is typically advised to repot during the dormant season, you can still carefully repot a fig tree if it is producing fruit. Don’t disturb the developing fruits, please.